Deck: How to Build a Deck Planter
Assemble and mount this simple planter in less than an hour

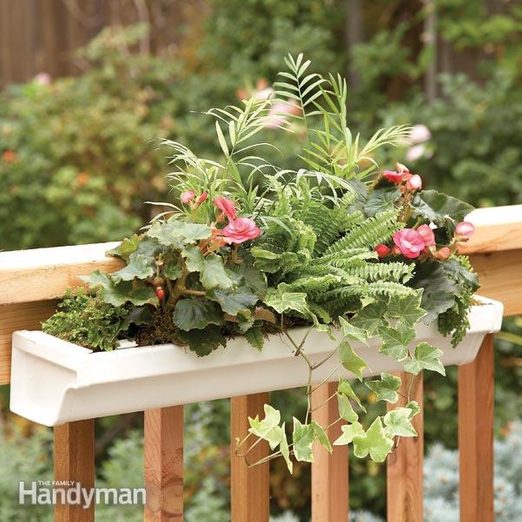
Make a simple railing-mounted planter from standard gutter parts. You can complete it in an hour for less than $15.
By the DIY experts of The Family Handyman Magazine
Assemble a rail-mounted planter
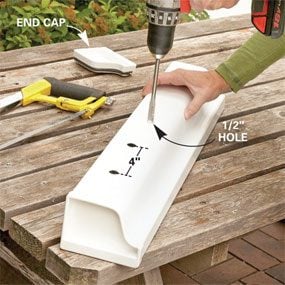
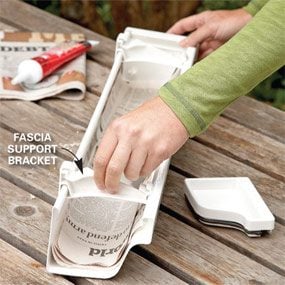
This lightweight, durable and attractive deck planter is made from a vinyl gutter, two fascia support brackets and two end caps. It’s a snap to make. Glue one of the end caps in place and drill holes in the bottom of the gutter so the water can drain (Photo 1). Slide two fascia support brackets onto the gutter (Photo 2) and glue the other end cap into place. If you want a longer planter, be sure to add extra brackets spaced about every 2 ft.—dirt is heavy.
To prevent the soil from slipping through the drainage holes, line the gutter with newspaper or put shards of old broken clay pots along the bottom.
Shallow planters like these have a tendency to dry out. To cut your watering chore in half, mix water-absorbing polymer gel crystals (available at garden centers) with your potting mix. Or buy bags of soilless potting mix with the polymer crystals already added.
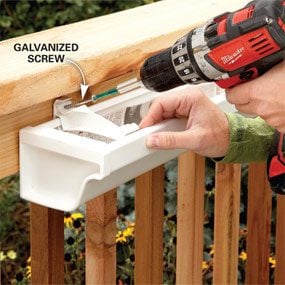
If you want a color other than white, use a spray paint formulated for plastic. Screw the planter to your deck rail (Photo 3), fill it with potting mix and add your plants. Enjoy!
Required Tools for this Project
Have the necessary tools for this DIY project lined up before you start—you’ll save time and frustration.
- Drill bit set
- Drill/driver – cordless
- Hacksaw
Required Materials for this Project
Avoid last-minute shopping trips by having all your materials ready ahead of time. Here’s a list.
- Caulk
- End caps – 2
- Support brackets – 2 or more
- Vinyl gutter


